End of Tenancy Cleaning: A Practical, SEO-Friendly Approach to a Stress-Free Move Out
End of tenancy cleaning is one of the most important tasks tenants face when moving out of a rental property. Whether you are leaving a flat, apartment, student house, or family home, a spotless finish can make the difference between a smooth handover and costly disputes. End of tenancy cleaning is not just about tidying up; it is about restoring the property to the standard expected by landlords, letting agents, and inventory clerks.
For many renters, the move-out period is already busy. Packing boxes, arranging removals, changing addresses, and managing utility transfers can be overwhelming. That is why planning your end of tenancy cleaning early matters. A well-organized clean helps you protect your deposit, reduce stress, and leave the property in excellent condition.
In this article, we will look at what end of tenancy cleaning involves, why it matters, what areas are often inspected, and how tenants can approach the task efficiently. You will also find practical tips, checklists, and useful insights to make your move-out process easier. If you are searching for reliable information about end of tenancy cleaning in a rented property, this content will help you understand what to expect and how to prepare.
What Is End of Tenancy Cleaning?
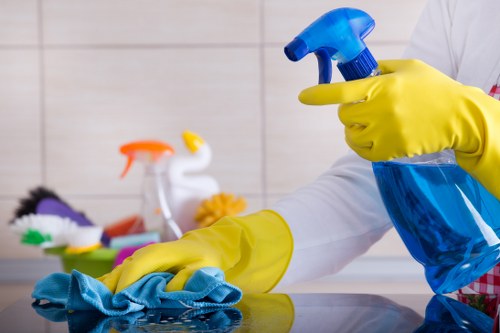
End of tenancy cleaning is a deep and detailed cleaning process carried out when a tenant moves out of a rental home. It is designed to return the property to the condition it was in at the start of the tenancy, allowing normal wear and tear to be distinguished from neglect or damage. Unlike everyday tidying or weekly housework, this service focuses on areas that are often overlooked.
The purpose of end of tenancy cleaning is to meet the expectations set out in your tenancy agreement. Many landlords and estate agents require the property to be left in a professionally cleaned state. This does not always mean you must hire a professional company, but it does mean the home should look thoroughly cleaned, hygienic, and ready for the next occupant.
Typical tasks include cleaning ovens, descaling bathrooms, wiping skirting boards, polishing fixtures, vacuuming carpets, and removing dust from hard-to-reach places. The exact standard can vary, but the aim is always the same: present the property in a move-in-ready condition.
Why End of Tenancy Cleaning Matters

For tenants, one of the biggest reasons to prioritize end of tenancy cleaning is the deposit. Deposit deductions often happen when the property is left dirty or when cleaning standards are not met. A proper clean reduces the risk of disputes and gives you a stronger position if the landlord or letting agent raises concerns.
Another reason is compliance. Many tenancy agreements specify that the property must be returned in a clean condition. Failing to do so may lead to additional charges, which are often more expensive than doing the cleaning yourself or booking a professional service. In practical terms, end of tenancy cleaning is an investment in peace of mind.
There is also a reputational benefit. If you have maintained a good relationship with your landlord, leaving the property spotless reinforces that trust. It can support better references in the future and make the final inspection easier. In competitive rental markets, a clean handover shows responsibility and care.
What Landlords and Agents Usually Inspect

At the end of a tenancy, landlords and agents often use an inventory report to compare the current condition of the property with the original check-in document. This means every visible surface can matter. The inspection usually focuses on cleanliness, hygiene, and whether the home has been maintained properly.
Common inspection points include kitchens, bathrooms, floors, windows, appliances, cupboards, upholstery, and walls. A missed area such as grime around taps or grease inside the oven can trigger a complaint, even if the rest of the home looks clean. That is why end of tenancy cleaning needs to be thorough rather than superficial.
Typical areas inspected:
- Kitchen appliances and cabinets
- Bathroom tiles, sinks, toilets, and shower screens
- Carpets, rugs, and flooring
- Window sills, frames, and glass
- Doors, handles, switches, and skirting boards
- Light fittings, vents, and ceilings
Key Areas of End of Tenancy Cleaning
End of tenancy cleaning covers more than simply vacuuming and dusting. It often requires a top-to-bottom clean of the whole property. The following sections break down the areas that usually need the most attention.
Kitchen Cleaning
The kitchen is usually the most time-consuming part of end of tenancy cleaning. Grease, food residue, limescale, and stubborn stains build up over time, especially around cooking areas and appliances. A clean kitchen makes a strong first impression during the final inspection.
Focus areas in the kitchen:
- Oven, hob, and extractor fan
- Inside and outside of cupboards
- Fridge and freezer, including shelves and seals
- Sink, taps, and splashbacks
- Worktops and tiled surfaces
Do not forget to clean behind appliances where possible. Even a small buildup of dust and debris can be noticed during inspection. A sparkling kitchen is one of the clearest signs of careful end of tenancy cleaning.
Bathroom Cleaning
Bathrooms require special attention because they are prone to soap scum, limescale, mold, and water stains. A fresh bathroom immediately signals that the property has been well cared for. For effective end of tenancy cleaning in a bathroom, aim for both visual cleanliness and hygiene.
Pay close attention to the toilet, bathtub, shower screen, grout, tile edges, mirrors, and drains. If the bathroom has poor ventilation, check for mold around windows and corners. Use appropriate cleaners for different surfaces to avoid damage while still achieving a deep clean.
Bathroom cleaning checklist:
- Descale taps, showerheads, and glass panels
- Scrub the toilet, including the base and behind it
- Clean the sink, cabinet fronts, and handles
- Polish mirrors and chrome fixtures
- Remove limescale from tiles and screen edges
Why bathrooms are often flagged
Bathrooms are heavily used and can show signs of neglect quickly. Even if the property looks tidy overall, a stained basin or dirty grout can undermine the impression of the whole home. This is why detailed end of tenancy cleaning must include bathroom sanitation, not just surface wiping.
Living Room and Bedroom Cleaning

Living rooms and bedrooms may appear simpler to clean, but they still require attention to detail. Dust settles on skirting boards, shelves, lamps, and behind furniture. Carpets collect debris, and marks on walls or door frames can become visible in natural light. These spaces are often judged by how fresh, dust-free, and orderly they look.
Vacuum carpets thoroughly, clean under beds and sofas where possible, and wipe down surfaces. If the tenancy agreement allows, remove any stickers, nails, or hooks that were added during the tenancy. Be careful not to damage paintwork while cleaning marks from walls.
Bedroom and living room tasks:
- Dust all reachable surfaces
- Vacuum carpets and edges
- Clean windows, sills, and tracks
- Wipe doors, handles, and switches
- Remove cobwebs from corners and ceilings
How to Prepare for End of Tenancy Cleaning
Preparation can make the entire process faster and more effective. Before beginning your end of tenancy cleaning, take a few practical steps to organize the work. Start by reading your tenancy agreement and checking whether the property requires a specific standard or professional cleaning receipt.
Next, review the inventory report if you still have a copy. This can help you identify what condition the property was originally in and what areas may be checked during the move-out inspection. Having this information before you begin gives you a clearer target.
It is also useful to clean after all your belongings have been removed. Trying to clean around boxes and furniture usually leads to missed spots. Once the property is empty, you can access every corner and complete a much more effective end of tenancy clean.
Create a Cleaning Plan
A room-by-room plan keeps the process manageable. Break the job into sections, assign a time estimate to each one, and gather the correct supplies before you begin. For larger properties, working from top to bottom and from back to front can save time and reduce repeated effort.
Useful planning steps:
- Set a cleaning date after packing is complete
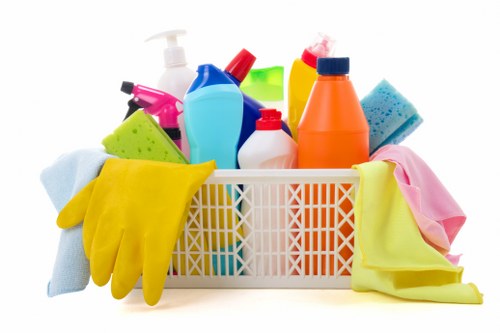
- Gather cloths, sprays, gloves, mop, vacuum, and sponges
- Check which areas need specialist products
- Allow time for drying and final touch-ups
DIY or Professional End of Tenancy Cleaning?
Many tenants ask whether they should handle end of tenancy cleaning themselves or hire a professional team. The answer depends on your budget, available time, and confidence in meeting the required standard. Both approaches can work well if done properly.
DIY cleaning can save money, especially if the property is in good condition and you have the right tools. However, it can also be physically demanding and time-consuming. Professional cleaners bring experience, specialist products, and efficient methods that help them reach a high standard quickly.
Consider DIY if:
- The property is small or moderately clean
- You have enough time before the move-out date
- You already own cleaning equipment
- You are comfortable with detailed cleaning tasks
Consider professional end of tenancy cleaning if:
- You are short on time
- The property needs a deep clean
- There are carpets, ovens, or stubborn stains to tackle
- You want added confidence for the final inspection
What professionals often bring
Professional cleaners may use steam cleaners, industrial-grade degreasers, limescale removers, and specialist carpet equipment. Their experience can be particularly helpful for tough kitchen or bathroom areas where standard household products may not be enough. For many tenants, this makes end of tenancy cleaning more efficient and less stressful.
Tips for a Successful End of Tenancy Clean
A successful result depends on strategy as much as effort. Small details can make a big difference, especially during the final inspection. The following practical tips can help you improve results and avoid common mistakes.
Top tips to follow
- Start cleaning early rather than leaving everything for the final day.
- Use the right product for each surface to avoid damage.
- Clean from top to bottom so dust does not fall onto already cleaned areas.
- Pay attention to hidden places like behind radiators and under appliances.
- Leave doors, windows, and cupboards open while drying to prevent odors.
- Replace any burned-out bulbs if the tenancy agreement expects this.
- Remove bin waste, old food, and personal items before inspection.
Another useful habit is to inspect the property in daylight. Natural light reveals dust, streaks, and marks that indoor lighting can hide. Before the keys are returned, do one final walk-through room by room. This final step often catches overlooked details that matter during end of tenancy cleaning.
Common Mistakes Tenants Make
Even tenants with good intentions can make mistakes during end of tenancy cleaning. One of the most common issues is underestimating how detailed the work needs to be. A quick tidy rarely meets inspection standards if dirt remains in corners, around fixtures, or inside appliances.
Another mistake is using the wrong cleaning products. Harsh chemicals can damage surfaces, while weak products may not remove grease or limescale effectively. It is always better to test on a small area first when working with sensitive materials like wood, stone, or painted walls.
Other frequent errors include:
- Forgetting to clean inside cupboards and drawers
- Ignoring ovens, extractors, and fridge seals
- Leaving limescale in bathrooms
- Missing skirting boards, window tracks, and light switches
- Not allowing enough time for a final inspection
To avoid these issues, use a room-by-room checklist and revisit each area after cleaning. This extra step helps ensure your end of tenancy cleaning covers everything expected.
End of Tenancy Cleaning Checklist
A checklist is one of the most effective tools for staying organized. It ensures nothing is forgotten and helps you track progress as you move through each room. Use the list below as a starting point and adapt it to the property size and condition.
Full property checklist
- Remove all personal belongings and rubbish
- Dust all rooms, shelves, and fittings
- Vacuum carpets and mop hard floors
- Clean skirting boards, switches, and handles
- Wash windows, sills, and frames
- Deep clean kitchen appliances and cabinets
- Scrub bathroom fixtures and remove limescale
- Clean doors, radiators, and vents
- Check for cobwebs, marks, and smudges
- Perform a final walk-through before handing back the keys
Using a checklist also creates a sense of progress, which is helpful during a stressful move. As each task is completed, you can move on confidently knowing your end of tenancy cleaning is on track.
Small details that make a big difference
Do not overlook items such as plug sockets, inside microwave doors, dust on top of wardrobes, or grime around washing machine seals. These small areas are easy to miss, but they often stand out during inspection. Attention to detail is what separates a standard clean from effective end of tenancy cleaning.
How End of Tenancy Cleaning Supports a Smooth Move
Moving house can be stressful, but a clean and orderly property handover helps make the process smoother. Once the cleaning is complete, you can focus on the final stages of your move with greater confidence. You also reduce the likelihood of deposit deductions, disagreements, or last-minute return visits.
For tenants who want to leave on good terms, end of tenancy cleaning is a simple but powerful way to show respect for the property. It reflects responsibility, protects your financial interests, and creates a positive final impression. Even if moving day is hectic, setting aside time for a thorough clean is worth the effort.
In competitive rental markets, expectations can be high. That is why many people choose to combine careful DIY work with professional support for specific tasks such as carpet cleaning or oven cleaning. This balanced approach can offer the best result while keeping costs under control.
Final Thoughts on End of Tenancy Cleaning
End of tenancy cleaning is more than a final chore. It is a key part of ending a tenancy responsibly and successfully. Whether you clean the property yourself or hire specialists, the goal remains the same: leave the home in a condition that meets the required standard and supports a smooth handover.
From kitchens and bathrooms to living rooms and bedrooms, every area deserves attention. A structured plan, the right cleaning materials, and a careful final inspection will help you get the best outcome. With the right approach, end of tenancy cleaning can be completed efficiently and with far less stress.
If you are preparing to move out soon, now is the best time to plan your cleaning schedule. Get organized, follow a room-by-room checklist, and make sure every surface is ready for inspection. Contact us today to arrange expert support, or book your service now if you want a professional finish that helps protect your deposit.